Ever feel like you’re running a 24/7 restaurant where the menu changes based on who’s grumpiest? I get it. One kid won’t touch anything green, another thinks all sauces are suspicious, and getting a “yum” instead of a “yuck” feels like a major win.
That’s why I’m always on the hunt for recipes that feel like a treat for everyone, including the cook. My latest victory? Mini Cheesecakes. They sound fancy, but I promise, they are the opposite of complicated.
These little guys are my secret weapon for turning a tough day into a sweet, happy ending. They’re a quick dessert that feels special, and the best part? You probably have everything you need in your kitchen right now.
Recipe Overview
- Cuisine: American
- Category: Dessert
- Prep Time: 15 minutes
- Cook Time: 20 minutes
- Total Time: 35 minutes (plus chilling)
- Servings: 12 mini cheesecakes
Why Even My Picky Eaters Love This!
Let’s be real. Kid approval is the real gold star. This recipe gets it for a few smart reasons.
First, the size is perfect. A full slice of cheesecake can be overwhelming. A mini one is just right for little hands and appetites. It feels like their own personal dessert.
Mini Cheesecakes Recipe
Our Family-Friendly Ingredient List
The Full Step-by-Step Instructions
Notes
Enjoy your homemade Mini Cheesecakes Recipe!
Second, you have total control. They can choose their own topping, or have it plain. That sense of choice is a game-changer for resistant eaters. Finally, they’re not too rich or tangy. The flavor is smooth, creamy, and just sweet enough to be a hit.
Our Family-Friendly Ingredient List
No fancy grocery trips required! This list is all about simplicity and accessibility.
- 12 foil or paper liners for a muffin tin
- 1 cup graham cracker crumbs (about 8 full sheets)
- 3 tablespoons melted butter
- 1 tablespoon granulated sugar
- 16 oz (two blocks) full-fat cream cheese, softened
- 1/2 cup granulated sugar
- 2 large eggs, at room temperature
- 1 teaspoon pure vanilla extract
- A pinch of salt
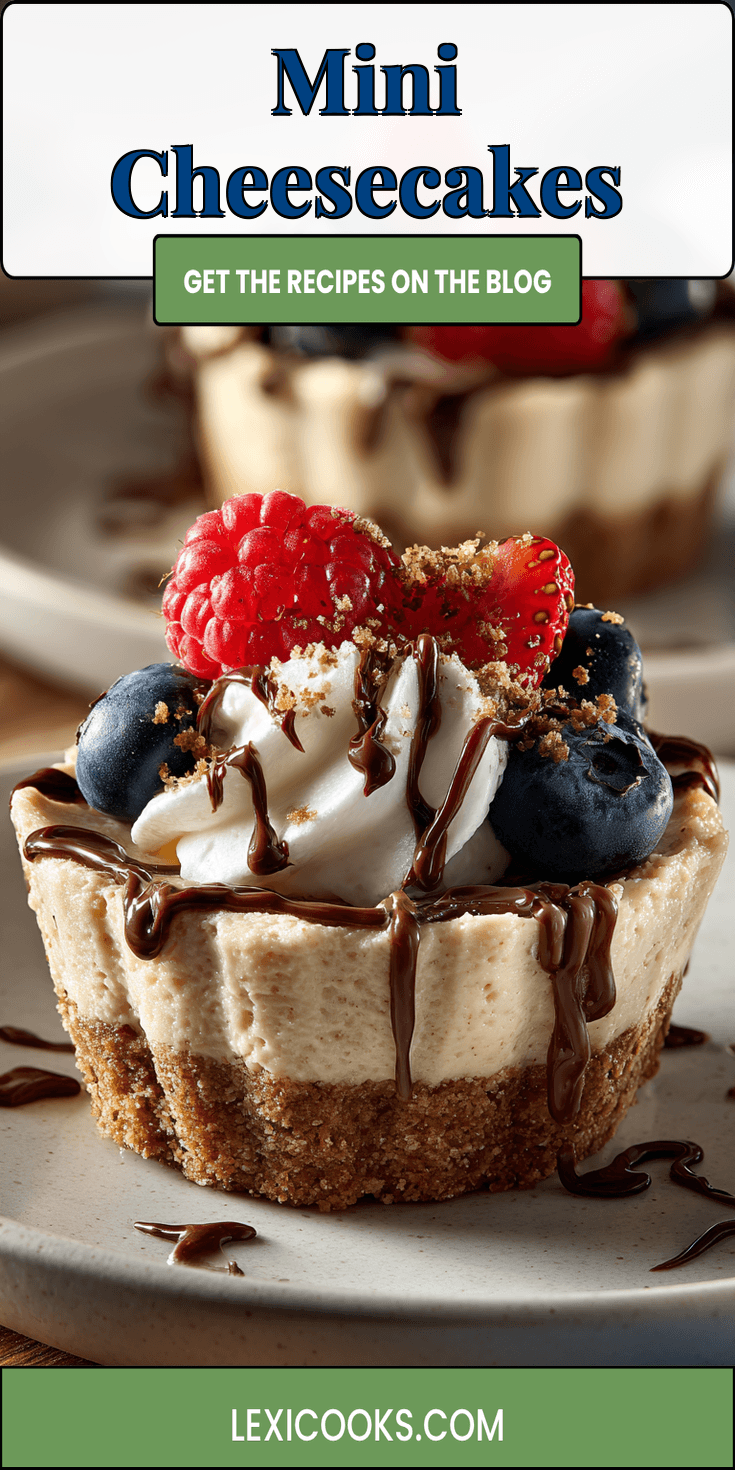
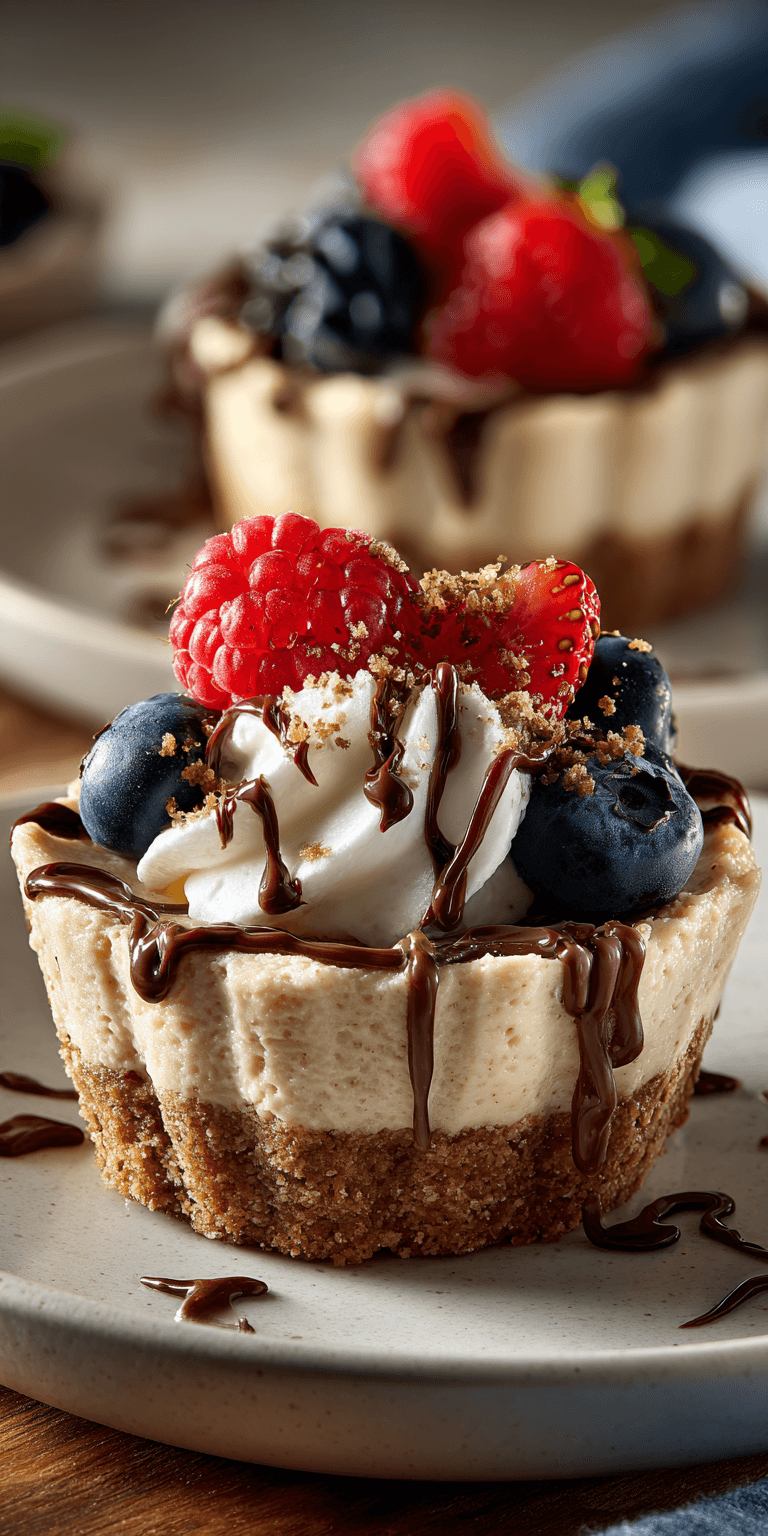
- Your favorite toppings: berry sauce, chocolate chips, fresh fruit, or a dollop of whipped cream
How to Get the Kids Involved in Cooking This
Getting kids in the kitchen builds confidence and makes them more excited to eat the results. Here are two perfect jobs for little helpers.
Job One: Crumb Duty. Put the graham crackers in a zip-top bag, seal it tightly, and let them go to town with a rolling pin. It’s a fantastic (and safe) way for them to release some energy!
Job Two: Topping Commanders. Once the cheesecakes are baked and cooled, set up a topping station with small bowls of berries, sprinkles, or chocolate chips. Let them decorate their own. It’s a fun, creative finish.
The Full Step-by-Step Instructions
Don’t let the word “cheesecake” intimidate you. This process is straightforward and hard to mess up. I’ve made these in a pre-dinner frenzy more times than I can count.
- Preheat your oven to 325°F (160°C). Line a 12-cup muffin tin with liners.
- Make the crust. In a medium bowl, mix the graham cracker crumbs, melted butter, and 1 tablespoon of sugar until it looks like wet sand.
- Press about 1 tablespoon of the crumb mixture firmly into the bottom of each liner. I use a small glass or the back of a spoon to really pack it down.
- Make the filling. Using a hand mixer or stand mixer, beat the softened cream cheese until it’s completely smooth and creamy. This is key for no lumps!
- Add the 1/2 cup sugar and beat again until combined. Then, add the eggs one at a time, mixing after each. Finally, beat in the vanilla and pinch of salt just until smooth.
- Divide the filling evenly among the 12 liners, filling them almost to the top.
- Bake for 18-22 minutes. The centers should look just set and might have a slight jiggle. They will firm up as they cool.
- Let the cheesecakes cool in the pan on a wire rack for 30 minutes, then transfer them to the fridge to chill for at least 2 hours before serving.
Fun Twists for Different Tastes
The basic recipe is a blank canvas. Here’s how we mix it up to please everyone at the table.
For the chocolate lovers, mix 1/2 cup of mini chocolate chips into the filling before baking. You can also press an Oreo cookie (instead of graham crumbs) into the liner for the crust.
For a fruity twist, place a single raspberry or blueberry in the center of each unbaked filling before it goes in the oven. It sinks in and creates a yummy surprise.
For super sensitive palates, serve all toppings on the side. A plain mini cheesecake is still a delicious win. For the adults, a drizzle of salted caramel or a sprinkle of espresso powder on top feels gourmet.
Storing & Reheating (Perfect for Busy Nights)
These are fantastic make-ahead treats! They store beautifully, which is a lifesaver for busy weeks.
Keep them covered in the refrigerator for up to 5 days. You can also freeze them for up to 2 months. Just place the chilled cheesecakes in a single layer on a baking sheet to freeze solid, then transfer to a freezer bag.
Thaw overnight in the fridge. No reheating needed—they are perfect served cold straight from the fridge for a quick dessert.
Nutrition Notes
As with any dessert, these are a “sometimes food” in our house. Here’s a basic look at what’s in them, so you can feel informed.
- Each plain mini cheesecake (without topping) has roughly 220 calories.
- They provide a small amount of protein and calcium from the cream cheese and eggs.
- Using full-fat cream cheese gives the best texture and helps the kids feel satisfied with just one.
- You can boost the fruit factor by using a homemade berry topping for added vitamins.
FREQUENTLY ASKED QUESTIONS
Can I use low-fat cream cheese?
I don’t recommend it for this recipe. Full-fat cream cheese gives the right structure and creamy texture. Low-fat versions can make the filling watery and prevent it from setting properly.
Why do my ingredients need to be at room temperature?
This is the biggest trick for a smooth filling! Room temperature ingredients blend together easily and evenly. If your cream cheese is cold, you’ll end up with lumps no matter how long you mix.
Do I really have to chill them for so long?
Yes, I promise it’s worth the wait! The chilling time is what allows the cheesecakes to fully set and develop their perfect creamy, sliceable texture. If you skip it, they’ll be a gooey mess.
So there you have it—my not-so-secret weapon for a happy dessert time. These mini cheesecakes have saved many a “nothing sounds good” evening at our place.
They’re simple, forgiving, and bring a little joy to the table. That’s a win in my book any day of the week.
I’d love to know if this was a hit with your family! Did your kids pick a favorite topping? Please leave a comment and rating below!