Is there anything more frustrating than making a “special” dessert, only to have your kids poke at it and ask for a bowl of cereal instead? I feel that in my soul. We work so hard to make something delicious and pretty, and sometimes it feels like a total gamble.

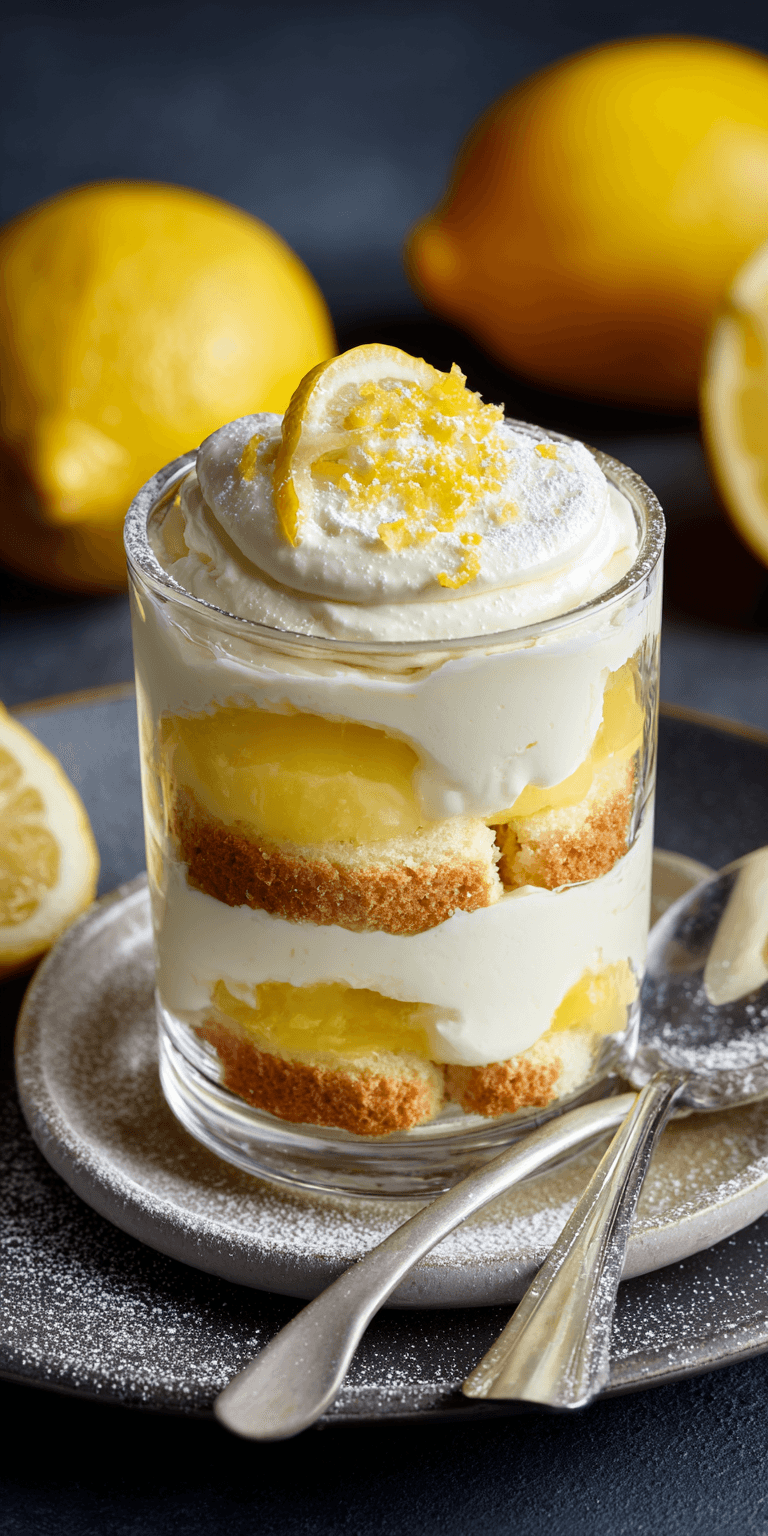
That’s why I’m so excited to share this Lemon Tiramisu with you. It’s the dessert that finally broke the cycle in my house. It looks impressive, tastes like a sunny dream, and—here’s the magic—my pickiest eater actually asked for seconds. It’s a springtime miracle in a dish.
This isn’t a fussy, complicated recipe. It’s a no-bake wonder that comes together with simple ingredients. We’re talking bright, fresh lemon flavor, creamy sweetness, and a fun texture that kids love. It’s the perfect bridge between “kid dessert” and “adult dessert,” and I can’t wait for you to try it.
Recipe Overview
- Cuisine: Italian-Inspired
- Category: Dessert
- Prep Time: 25 minutes
- Cook Time: 0 minutes
- Total Time: 25 minutes (plus 4+ hours to chill)
- Servings: 9-12
Why Even My Picky Eaters Love This!
I’ve learned that success with picky eaters often comes down to a few key things. This dessert hits them all. First, it’s familiar. The creamy layers remind them of pudding or yogurt cups they already know and trust.
Second, the lemon flavor is bright and sweet, not sour or bitter. It’s refreshing and clean. And third, the texture is a winner. The soft ladyfingers get a little cakey, and there are no weird lumps or surprises. It’s just smooth, creamy, and delicious.
Our Family-Friendly Ingredient List
I promise, nothing crazy here! You can find everything at a standard grocery store. This is all about simple, good flavors working together.
Lemon Tiramisu Recipe
Our Family-Friendly Ingredient List
The Full Step-by-Step Instructions
Notes
Enjoy your homemade Lemon Tiramisu Recipe!
- 1 1/2 cups heavy whipping cream (cold!)
- 8 oz. mascarpone cheese, softened
- 1 (14 oz.) can sweetened condensed milk
- 3/4 cup fresh lemon juice (about 4-5 lemons)
- 2 tablespoons lemon zest
- 1 teaspoon pure vanilla extract
- 1 (7 oz.) package of crisp ladyfinger cookies (Savoiardi)
- 1 cup hot water
- Optional for garnish: extra lemon zest, whipped cream, or fresh berries
How to Get the Kids Involved in Cooking This
Getting kids in the kitchen is a game-changer. When they help make it, they’re way more likely to try it. Here are two perfect jobs for little (or big) helpers.
Job 1: The Zest Master. With close supervision, let them zest the lemons using a microplane. It’s fun, safe, and makes the kitchen smell amazing. Just watch those knuckles!
Job 2: The Layer Architect. Kids are fantastic at assembly lines. Let them be in charge of dipping the ladyfingers (quickly!) and placing them in the dish. Then, they can spoon on the creamy filling. It’s like edible building blocks.
The Full Step-by-Step Instructions
Don’t let the fancy name fool you. This is seriously easy. Just follow these steps and pop it in the fridge. The hardest part is waiting for it to set!
- Get your dish ready. Grab a 9×9 inch or similar sized baking dish. Set it aside.
- Make the lemon soak. In a shallow bowl, mix the hot water with 1/4 cup of the fresh lemon juice. This is what we’ll dip the ladyfingers in.
- Whip the cream. In a large bowl, use a hand mixer to beat the cold heavy cream until you have stiff peaks. This means when you lift the beaters, the cream stands up straight. Set this bowl aside.
- Make the lemon filling. In another large bowl, beat the softened mascarpone and sweetened condensed milk until smooth. Beat in the remaining 1/2 cup of lemon juice, the lemon zest, and the vanilla.
- Fold it together. Gently add the whipped cream to the lemon-mascarpone mixture. Use a spatula to fold it in until just combined and no white streaks remain. This is your magic filling.
- Assemble the first layer. Quickly dip each ladyfinger into the lemon-water mixture for 1-2 seconds per side. You want them moist but not soggy. Line the bottom of your dish with them.
- Add half of the creamy filling. Spread it evenly over the ladyfinger layer.
- Repeat! Make a second layer of dipped ladyfingers, then top with the rest of the filling.
- Chill and set. Cover the dish with plastic wrap and refrigerate for at least 4 hours, but overnight is best. This wait is crucial for the flavors to meld and the texture to become perfect.
- Serve. Before serving, garnish with a little extra lemon zest or a berry. Slice and enjoy!
Fun Twists for Different Tastes
One recipe doesn’t have to mean one flavor! Here’s how to tweak this for everyone at your table.
For the berry lovers: Add a layer of sliced fresh strawberries or raspberries between the cream layers. It adds a beautiful color and a fruity punch.
For a crunch: Sprinkle a layer of crushed shortbread cookies or graham crackers on top just before serving for a fun, crispy contrast.
For a dairy-free try: Use chilled coconut cream instead of heavy whipping cream, and look for a vegan mascarpone alternative. The lemon flavor will still shine!
Storing & Reheating (Perfect for Busy Nights)
The best part? This dessert is a make-ahead dream. It actually gets better the longer it sits.
Keep it covered in the refrigerator for up to 3 days. I don’t recommend freezing it, as the texture of the creamy layers can change. There’s no need to reheat—it’s meant to be served cold and refreshing straight from the fridge.
Nutrition Notes
Let’s keep it real—this is a treat! But it’s nice to know what’s in our food. Here’s a simple breakdown per serving (based on 12 servings).
- It’s a good source of calcium from the dairy.
- Using real lemon juice provides a boost of vitamin C.
- As with any sweet dessert, this is best enjoyed in moderation as part of a balanced diet.
FREQUENTLY ASKED QUESTIONS
Can I use bottled lemon juice instead of fresh?
I really recommend fresh lemons for this. The zest is key for that bright, true lemon flavor, and fresh juice just tastes cleaner. Bottled juice can sometimes have a metallic or preservative taste that comes through.
My store doesn’t have mascarpone. What can I use?
You can use full-fat, brick-style cream cheese in a pinch. Let it soften completely and beat it until it’s very smooth before adding the other ingredients. The flavor will be slightly tangier but still delicious.

The ladyfingers got too soggy. What happened?
This is the most common hiccup! You only need a very quick dip—literally 1-2 seconds total. Think “dunk and go.” If they sit in the liquid, they’ll fall apart. A light hand is your best friend here.
So there you have it! My secret weapon for a dessert that pleases the whole crowd. It’s a little bit fancy, a whole lot of easy, and has the kid-friendly stamp of approval from my toughest critics.
This lemon dessert is perfect for spring celebrations, a sweet end to a weeknight meal, or just because you deserve a pretty, homemade treat. I hope it brings as much sunshine to your table as it does to mine.
I’d love to know if this was a hit with your family! Did your kids want to help? Did you try any fun twists? Please leave a comment and rating below!