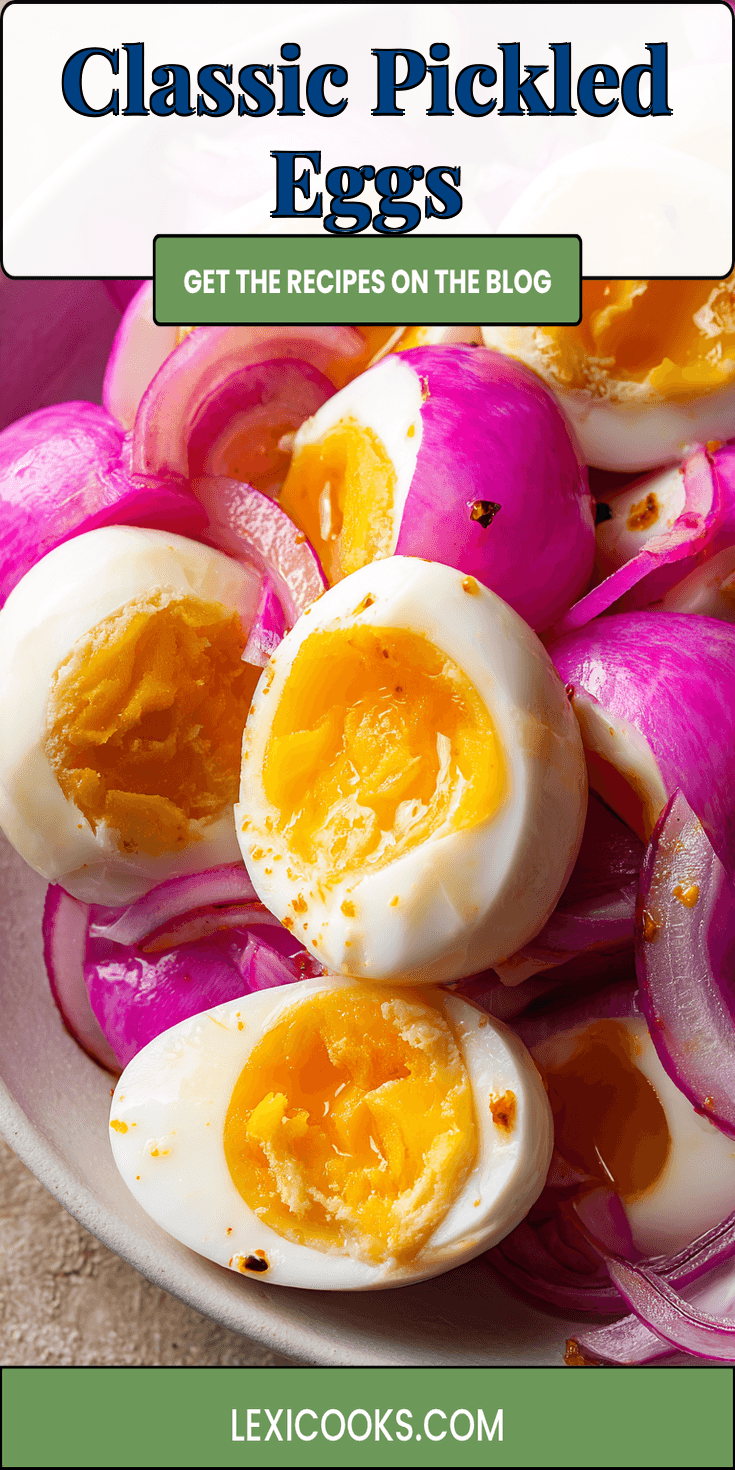
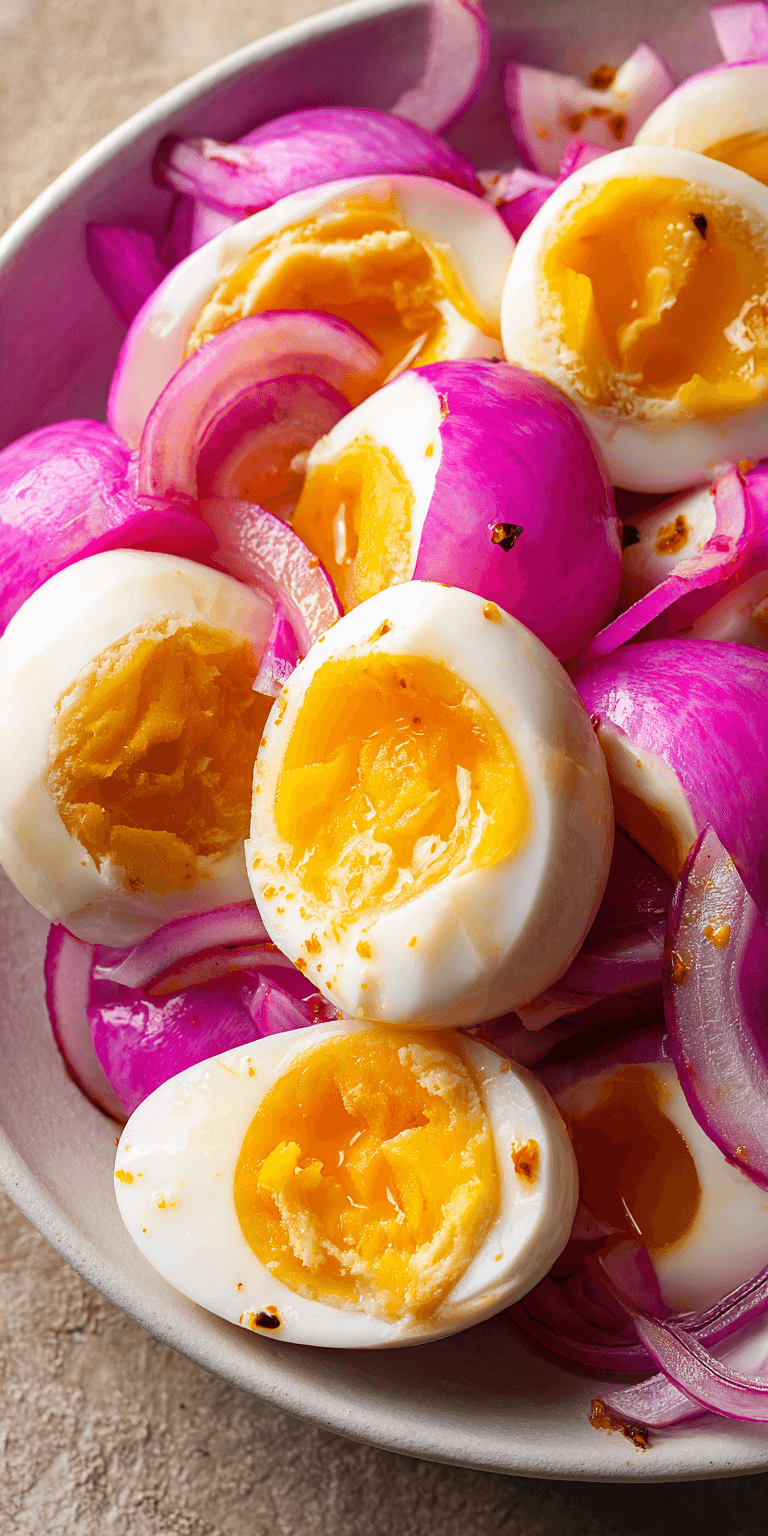
You think you know classic pickled eggs. You’ve seen them in jars at the bar.
But I bet yours have been rubbery, bland, or just plain boring. I know mine were.
That ends today. I’m sharing the one secret that changes everything. It’s not what you think.
Ready to make the only pickled eggs in a jar recipe you’ll ever need? Let’s go.
Recipe Overview
This is your blueprint. Everything from here builds on this simple foundation.
Classic Pickled Eggs Recipe
The “Upgraded” Ingredient List
The Pro-Method (Step-by-Step)
Notes
Enjoy your homemade Classic Pickled Eggs Recipe!
- Cuisine: American Traditional
- Category: Preserve, Snack, Appetizer
- Prep Time: 15 minutes
- Cook Time: 10 minutes
- Total Time: 5 days (for curing)
- Servings: 12 eggs
The Secret Ingredient That Makes All the Difference
It’s not a fancy spice. It’s not a rare vinegar. It’s something you already have.
The secret is time and temperature. Most recipes rush the eggs into hot brine.
That’s the biggest mistake. Hot brine cooks the egg whites again, making them tough.
My secret? You must cool the brine completely before it touches the eggs. This keeps the texture firm yet tender.
It’s the single best trick for perfect homemade pickled eggs every single time.
Why This Method is Better (My Pro-Tips)
I’ve made every mistake so you don’t have to. This method fixes them all.
First, we boil eggs perfectly. Start them in cold water, bring to a boil, then cover and remove from heat.
Let them sit for 12 minutes. This gives you a creamy yolk with no green ring.
Second, we build a layered brine. We simmer the spices first to pull out their oils.
Only then do we add the vinegar. This creates a deeper, more complex flavor base.
Finally, the complete cool-down. Patience here is your best tool.
The “Upgraded” Ingredient List
Every item here has a job. Don’t skip any if you want pro-level results.
- 12 large eggs, at least a week old (they peel easier)
- 2 cups white vinegar (5% acidity)
- 1 cup water
- 1 medium red onion, thinly sliced
- 4 cloves garlic, smashed
- 2 tbsp pickling spice
- 1 tbsp black peppercorns
- 2 tsp kosher salt
- 1 tsp mustard seeds
- 1-2 dried bay leaves
- (Optional) 1 small beet, peeled and quartered, for vibrant pink color
The Pro-Method (Step-by-Step)
Follow these steps in order. This is where the magic happens.
- Place eggs in a single layer in a pot. Cover with cold water by 1 inch.
- Bring to a full boil over high heat. Immediately cover, remove from heat, and set timer for 12 minutes.
- While eggs cook, prepare an ice bath. Transfer cooked eggs to the bath for 15 minutes to stop the cooking.
- For the brine: In a non-reactive saucepan, combine water, onion, garlic, spices, and salt. Bring to a simmer for 10 minutes.
- Remove from heat. Now, and only now, stir in the vinegar. Let this mixture cool to room temperature. This is critical.
- Peel your cooled eggs. Rinse them to remove any shell bits.
- Pack the peeled eggs and the onion slices tightly into a clean, 1.5-quart glass jar.
- Slowly pour the completely cooled brine over the eggs, making sure they are fully submerged.
- Seal the jar with a non-reactive lid (plastic is best). Refrigerate immediately.
- Wait at least 5 days before eating. For the best flavor, let them go a full week. The wait is worth it.
Common Mistakes & How to Fix Them
Even pros slip up. Here’s how to spot and solve the big issues.
Mistake #1: Rubbery Eggs. You used hot brine. Always, always cool it first. If you already did it, the texture is set. Learn for next time.
Mistake #2: Weak Flavor. The brine didn’t have enough punch. Your spice-to-vinegar ratio was off. Next time, simmer the spices longer or add an extra tablespoon of pickling spice.
Mistake #3: Floating Eggs. Eggs popping above the brine can discolor. Fix it by placing a clean, small fermentation weight or a folded cabbage leaf on top to keep them submerged.
Variations for the Adventurous Cook
Once you master the classic, play with these pro swaps. They’re fantastic.
Spicy Sichuan Style: Replace pickling spice with 2 tbsp Sichuan peppercorns and 6-8 dried red chiles. Add a star anise pod.
Sweet & Sour (With a Twist): For a pickled eggs without sugar base that’s still complex, add 1 cup of sliced apples to the simmering brine. They add natural sweetness.
Turmeric-Ginger: Add 2 inches of fresh sliced ginger and 1 tbsp turmeric powder to the simmering brine. You get incredible color and a health boost.
Nutrition Notes
These are a high-protein, low-carb snack. The values are per egg.
- Calories: ~80
- Protein: 6g
- Fat: 5g
- Carbohydrates: 1g
- Sodium: ~200mg (varies with brine absorption)
Your Pro-Level Questions Answered
These are the questions my chef friends ask. Now you have the answers.
How long do refrigerator pickled eggs really last?
If you keep them fully submerged and cold, they’re safe for 3-4 months. But the texture is best in the first 8 weeks. Always trust your nose and eyes.
Can I reuse the pickle egg brine recipe liquid?
I don’t recommend it for eggs. The brine absorbs egg proteins and loses its acidity. It’s a safety issue. Use a fresh batch every time.
Why are my pickeld eggs turning blue near the yolk?
Don’t panic! It’s a harmless reaction between iron in the yolk and sulfur in the white. It happens sometimes with older eggs or certain mineral-rich water. They’re still safe to eat.
A Few Final Secrets
You’re now in the inner circle. Here are my last bits of hard-won advice.
Label your jar with the date. It’s easy to forget when you made them.
The onion in the jar gets better than the eggs. Use it on salads or sandwiches.
For a stunning presentation, use a mix of white and brown eggs. They pickle the same, but the final look is gorgeous.
This DIY pickled eggs process is a craft. Your second batch will be better than your first. The third batch will be legendary.
Now that you have the secret, go try it! I want to hear all about it. Did the cold brine change the game for you? What variation did you try? Let me know in the comments below and rate this recipe if you loved it!