You’ve made a glazed ham before. The sweet crust, the salty meat—it’s a classic for a reason.
But I bet you’ve never made it like this. Your usual recipe is good. This one is a showstopper.
This Brown Sugar Glazed Ham with Honey Orange Glaze has one quiet secret that changes everything. It’s not in the glaze. It’s what you do before the glaze even comes into play. Ready to find out what it is?
Let me show you how a single, simple shift in your process can turn a great holiday centerpiece into the only one you’ll ever want to make again. This is the easy dinner recipe that feels anything but simple.
Recipe Overview
Here’s the quick look at what we’re making. This is your roadmap to a stunning main course.
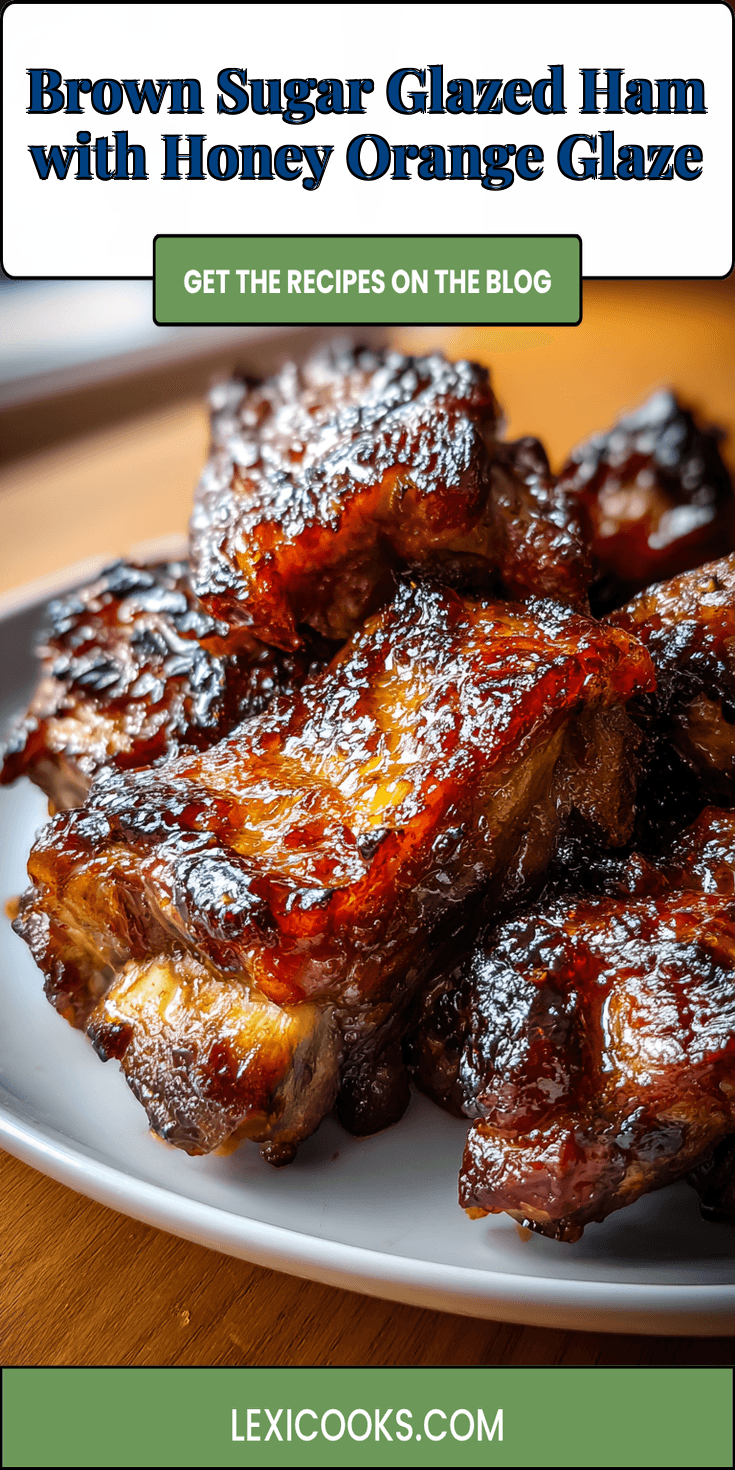
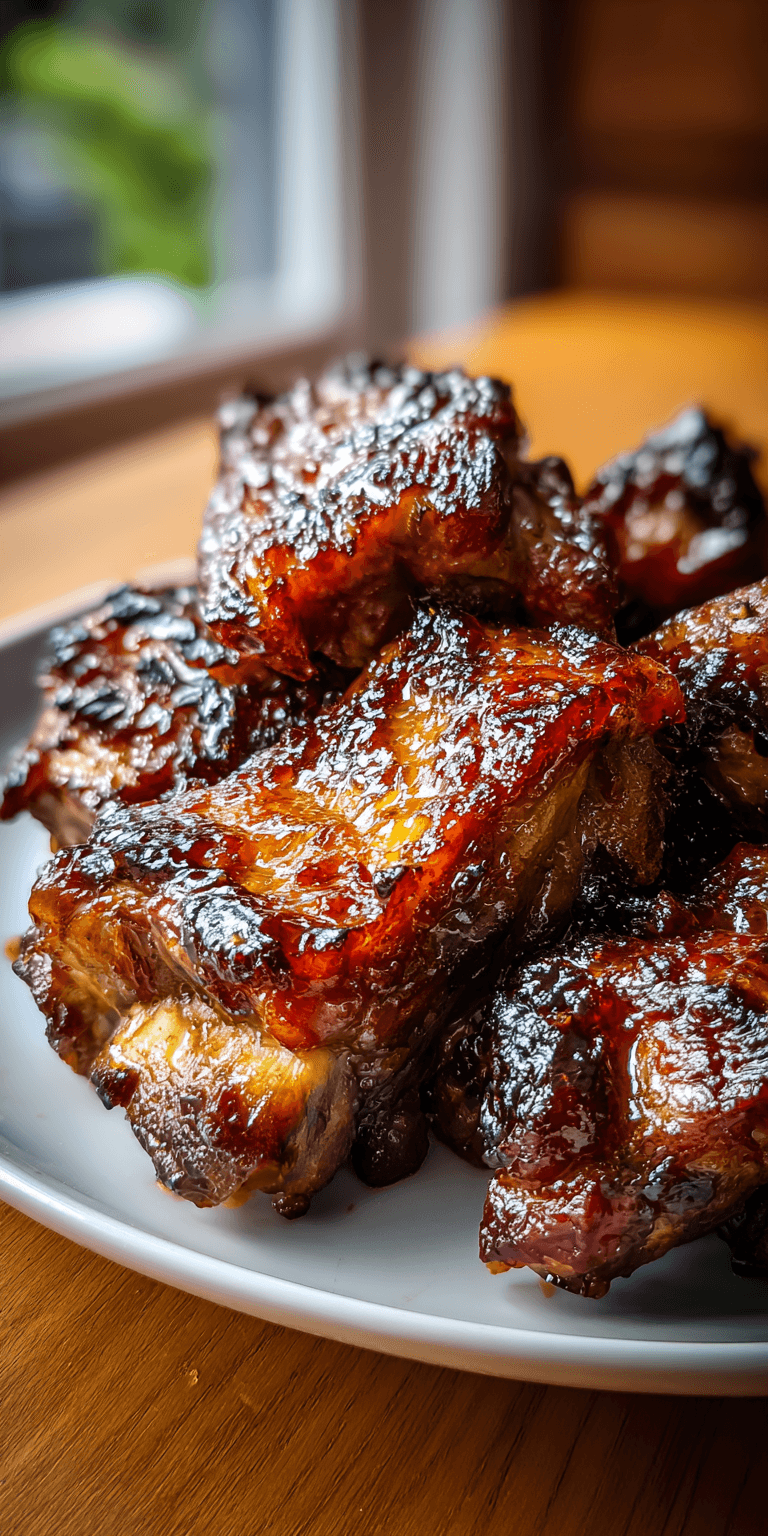
Brown Sugar Glazed Ham with Honey Orange Glaze Recipe
The “Upgraded” Ingredient List
The Pro-Method (Step-by-Step)
Notes
Enjoy your homemade Brown Sugar Glazed Ham with Honey Orange Glaze Recipe!
- Cuisine: American
- Category: Main Course
- Prep Time: 15 minutes
- Cook Time: 2 hours 15 minutes (approx.)
- Total Time: 2 hours 30 minutes
- Servings: 10-12
The Secret Ingredient That Makes All the Difference
I’ve hinted at it, and now I’ll tell you. It’s not something you buy. It’s something you do.
The secret is scoring and cloving. But not just anywhere. Most recipes tell you to score the fat cap in a basic diamond pattern and poke cloves in the corners. We’re going deeper.
You will score through the fat and just into the meat beneath. This creates tiny canals for the glaze to seep into, flavoring the ham from the inside out. The cloves go into the intersections, yes, but also along the lines themselves. This bakes the spice directly into the meat.
Why This Method is Better (My Pro-Tips)
My way focuses on building layers of flavor. It’s what separates a sticky coating from a truly glazed ham.
First, we gently warm the ham in a liquid bath. I use a mix of apple cider and a splash of the orange juice from our glaze. This keeps it incredibly moist and starts the flavor party early.
Second, we apply the glaze in stages. A thin base layer sets the stage. The final, thick application in the last 30 minutes creates that gorgeous, crackly, caramelized shell. Patience here is your best tool.
The “Upgraded” Ingredient List
Every component here has a job. There are no bystanders in this recipe.
- 1 (8-10 lb) fully cooked, bone-in spiral-cut ham
- 1 cup apple cider
- 1/2 cup fresh orange juice
- 1 cup dark brown sugar, packed
- 1/2 cup honey
- Zest of 1 large orange
- 1/4 cup Dijon mustard
- 2 tbsp unsalted butter
- 1 tsp ground cinnamon
- 1/2 tsp ground cloves
- Whole cloves for studding
The Pro-Method (Step-by-Step)
Follow these steps in order. Trust the process—it’s designed for maximum impact.
- Heat your oven to 325°F. Place the ham, cut side down, in a large roasting pan. Pour the apple cider and 1/4 cup of the orange juice into the pan bottom. This is your steaming liquid.
- With a very sharp knife, score the fat on top of the ham. Cut deep diamonds, about 1-inch apart, going through the fat into the first layer of meat. Stud the intersections and lines with whole cloves.
- Tent the ham loosely with foil and bake for about 1 hour and 15 minutes. This is the warm-up phase.
- While it bakes, make the glaze. In a saucepan, combine brown sugar, honey, the remaining orange juice, orange zest, Dijon, butter, cinnamon, and ground cloves. Simmer for 5-7 minutes until slightly thickened. Let it cool for 10 minutes.
- After the initial bake, remove the ham and foil. Brush on a thin, even layer of the glaze. Return to the oven, uncovered, for 30 minutes.
- Pull the ham out again. Apply the remaining glaze thickly, getting it into all the scored lines. Bake for a final 25-30 minutes until the glaze is dark, bubbly, and set. The internal temp should read 140°F.
- Rest the ham on a cutting board for 20-25 minutes before carving. This lets the juices settle and the glaze firm up perfectly.
Common Mistakes & How to Fix Them
Even pros hit snags. Here’s how to avoid or fix the big ones.
The glaze burns before the ham is hot. This means you applied the glaze too soon. If you see it darkening too fast, lay a piece of foil loosely over the top. Remember, the final glaze application should only need that last 30 minutes.
The scored fat doesn’t render, leaving a rubbery layer. This happens if your cuts aren’t deep enough. You must slice into the meat, not just the fat. Don’t be shy. The spiral cuts help, but your scoring is the key to texture.
Variations for the Adventurous Cook
Once you master the base, play with it. These are my favorite riffs.
Swap the apple cider for ginger beer. It adds a spicy, complex sweetness that pairs amazingly with the orange.
Add two tablespoons of bourbon or spiced rum to your glaze saucepan. Let it cook with the other ingredients. The alcohol cooks off, leaving a wonderful, warm depth behind.
For a savory edge, mix a tablespoon of finely chopped fresh rosemary into the glaze right before brushing it on for the final layer.
Nutrition Notes
This is a celebratory dish. Here’s a general look per serving, keeping in mind ham sizes vary.
- Calories: ~350
- Protein: 28g
- Carbohydrates: 22g
- Sugar: 21g
- Fat: 15g
- Sodium: 1200mg
Your Pro-Level Questions Answered
These are the questions I get from cooks who want to get it just right.
Can I make the glaze ahead of time?
Absolutely. Make it up to 3 days in advance and store it in the fridge. Gently reheat it on the stove or in the microwave until it’s spreadable before using. The flavors actually improve.
What if my ham is pre-sliced (spiral-cut)?
This is actually ideal. Just be extra careful when scoring. Follow the existing lines of the spiral cuts as a guide. The glaze will drip beautifully between the slices.
How do I get those picture-perfect slices?
Use a long, thin, sharp carving knife. Slice against the grain of the meat, not along the spiral. Find the natural muscle seams and let the knife do the work—don’t saw.
A Few Final Secrets
You have the blueprint. Now for the finishing touches that make it yours.
Save the pan drippings. After removing the ham, skim off the fat, then simmer the juices with a cup of broth for an incredible gravy. Stir in a spoonful of leftover glaze to tie it all together.
Let the ham rest fully. I know it’s hard to wait. But those 25 minutes are non-negotiable for juicy, neat slices that hold all the flavor we built.
This isn’t just another simple dinner. It’s your new signature move. The deep scoring, the staged glazing—these are the small acts that create a truly great dish.
Now that you have the secrets, I want to hear from you. Did the scoring change the game? What variation did you try? Tell me all about it in the comments below and leave a rating if you loved it!