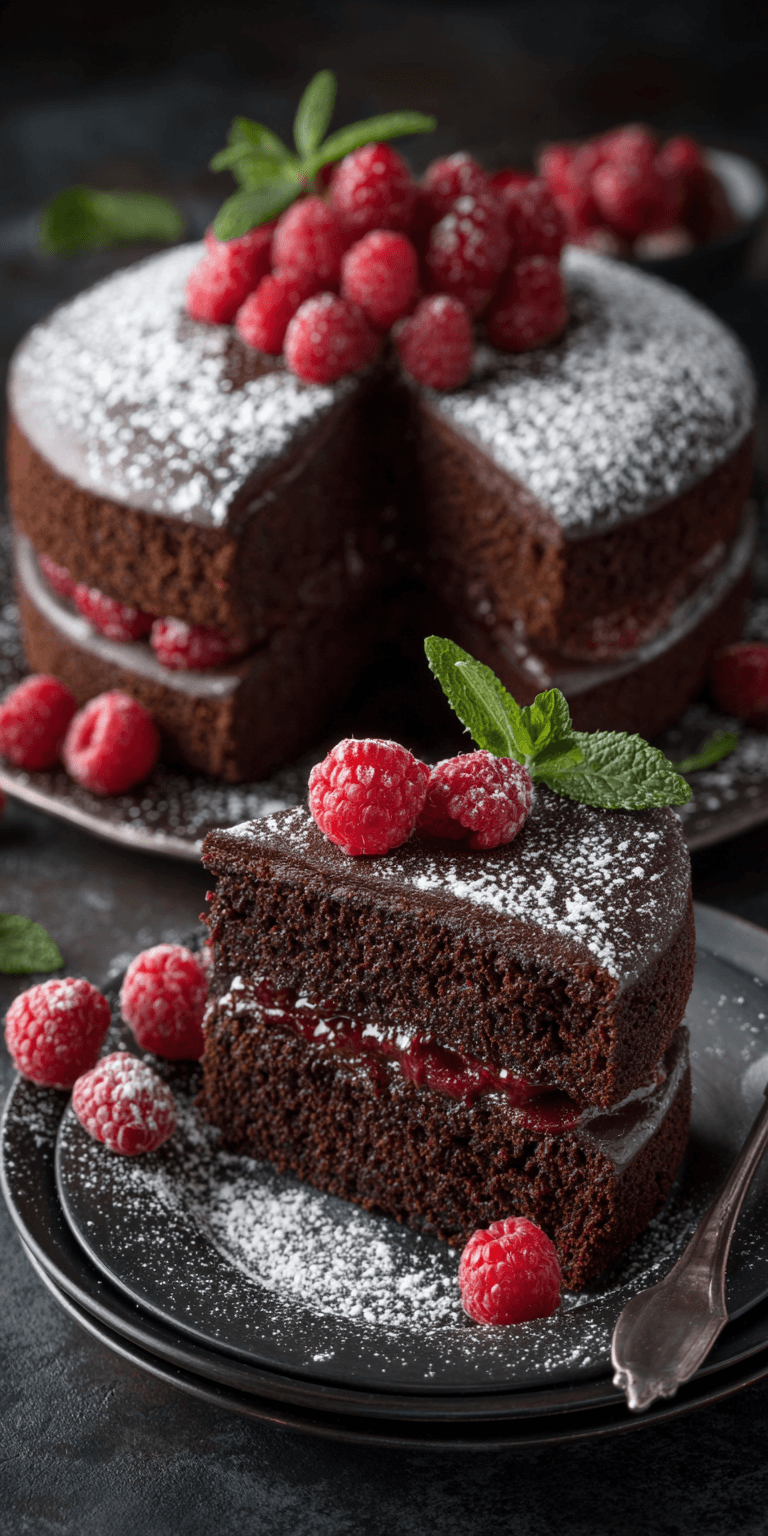
Want an elegant dessert that looks like it came from a fancy bakery but costs less than a fancy coffee? This Chocolate Raspberry Cake is my secret weapon.
I believe you don’t need expensive ingredients to eat well, or to create stunning desserts. This cake proves that point beautifully. It combines rich chocolate and tart raspberries for a show-stopping treat.
It’s perfect for a birthday, a dinner party, or just a Tuesday when you need a major pick-me-up. Let’s bake something incredible without breaking the bank.
Recipe Overview
Here’s the quick snapshot of what we’re making today. It’s simpler than you think.
- Cuisine: American
- Category: Dessert, Cake
- Prep Time: 25 minutes
- Cook Time: 35 minutes
- Total Time: 1 hour (plus cooling)
- Servings: 12 slices
Why This Recipe Saves You Money
This isn’t just a delicious cake; it’s a smart financial decision for your dessert cravings. Let me break down the savvy parts.
Chocolate Raspberry Cake Recipe
The Budget-Friendly Ingredient List
How to Make It (Step-by-Step)
Notes
Enjoy your homemade Chocolate Raspberry Cake Recipe!
First, we use simple pantry staples like flour, sugar, and cocoa powder. You likely have most of these already.
Second, we’re using oil instead of expensive butter. It keeps the cake incredibly moist and cuts cost. The flavor comes from high-quality cocoa, not fancy chocolate bars.
Finally, we use frozen raspberries. They are a fraction of the price of fresh, available year-round, and work perfectly in the filling and garnish.
My Tips for Smart Shopping on a Budget
Being a resourceful home baker is all about strategy. These tips have saved me hundreds.
Always buy cocoa powder, vanilla extract, and baking staples from the store brand. The quality is identical to name brands.
Frozen fruit is your best friend. For baking, frozen raspberries are perfect. They’re picked at peak ripeness and cost way less.
Check the “clearance” rack in the baking aisle. Sometimes you can find perfectly good sprinkles or extracts for a steal.
Buy generic buttermilk powder. You reconstitute it with water. It lasts forever and is cheaper than a carton you might not finish.
The Budget-Friendly Ingredient List
Here’s everything you need. Nothing here should shock your wallet.
- For the Cake:
- 2 cups all-purpose flour
- 1 3/4 cups granulated sugar
- 3/4 cup unsweetened cocoa powder (not Dutch-process)
- 2 tsp baking soda
- 1 tsp baking powder
- 1 tsp salt
- 2 large eggs
- 1 cup buttermilk (or 1 cup milk + 1 Tbsp vinegar)
- 1 cup strong black coffee, cooled (enhances chocolate flavor!)
- 1/2 cup vegetable oil
- 2 tsp vanilla extract
- For the Filling & Frosting:
- 12 oz frozen raspberries, thawed
- 1/4 cup granulated sugar
- 1 1/2 cups unsalted butter, softened
- 4 cups powdered sugar
- 1 tsp vanilla extract
- Pinch of salt
- Fresh raspberries & mint for garnish (optional)
How to Make It (Step-by-Step)
Follow these steps for a foolproof, moist cake every single time.
- Start by preheating your oven to 350°F (175°C). Grease and flour two 9-inch round cake pans. Line the bottoms with parchment paper for guaranteed easy release.
- Make the raspberry filling. In a small saucepan, combine the thawed frozen raspberries and 1/4 cup sugar. Cook over medium heat for 10-15 minutes, mashing the berries, until thickened. Strain to remove seeds if desired. Let it cool completely.
- Whisk the dry ingredients. In a large bowl, sift together the flour, sugar, cocoa, baking soda, baking powder, and salt. This ensures no lumps and a light crumb.
- Add the wet ingredients. Make a well in the center of the dry mix. Add the eggs, buttermilk, cooled coffee, oil, and vanilla. Whisk until just smooth. Do not overmix.
- Divide the batter evenly between the prepared pans. Bake for 30-35 minutes, until a toothpick inserted in the center comes out clean.
- Let the cakes cool in the pans for 10 minutes. Then, turn them out onto a wire rack to cool completely. This is crucial for frosting.
- Make the frosting. Beat the softened butter with an electric mixer until creamy. Gradually add the powdered sugar, vanilla, and salt. Beat on high for 3-4 minutes until very light and fluffy.
- Assemble the cake. Place one cake layer on your plate. Spread a thin layer of frosting over it. Pipe a frosting dam around the edge. Fill the center with the cooled raspberry filling.
- Top with the second cake layer. Frost the top and sides with the remaining buttercream. Swirl on the remaining raspberry filling for a beautiful marbled effect. Garnish with a few fresh berries if you have them.
How to Use Up Every Last Bit (No Waste!)
Being resourceful means leaving nothing behind. Here’s how to maximize every ingredient.
Leftover raspberry puree? Stir it into plain yogurt, oatmeal, or use it as a topping for pancakes or ice cream. It’s a fantastic flavor booster.
Extra frosting can be frozen for up to 3 months. Thaw it in the fridge and re-whip for your next baking project.
Stale cake crumbs (if you have any!) make an excellent topping for trifles or can be mixed into homemade ice cream.
If you bought buttermilk for this, use the rest to make fluffy pancakes, biscuits, or a creamy salad dressing.
Nutrition Notes
This is a treat, but it’s good to know what you’re enjoying. These are estimates per slice.
- Calories: ~520
- Fat: 24g
- Carbohydrates: 78g
- Sugar: 60g
- Protein: 4g
Common Questions About This Recipe
I get these questions a lot. Here are my practical answers.
Can I make this cake without coffee?
Absolutely. The coffee just deepens the chocolate flavor—it won’t taste like coffee. You can replace it with an equal amount of hot water.
What if I don’t have two cake pans?
No problem! Bake the batter in one pan, but increase the bake time by 10-15 minutes. Let it cool completely, then carefully slice the single cake horizontally into two layers.
How do I store this cake?
Because of the fresh fruit filling, store it covered in the refrigerator. It’s best eaten within 3 days. Let slices come to room temperature for 20 minutes before serving for the best texture.
See? Elegant desserts don’t require a trust fund. They require a little know-how and a willingness to see the potential in simple, affordable ingredients.
This Chocolate Raspberry Cake is proof that you can create something truly special on a tight budget. It’s a celebration of smart, savvy baking.
I’d love to hear how your cake turns out! Let me know your own money-saving twists or presentation ideas in the comments below! Please leave a rating!